
Setting up a Footprint Mobile User
Footprint Mobile Web can be setuo to use Microsoft Entra ID (formerly Azure Active Directory) to add to manage user access. This allows for some user access control to be managed through Datex Manager as is done for Footprint and Footprint Customer Portal. However there is some initial setup required and Role configuration is not within the current scope.
Prerequisites
- A Role is setup
- A Data Access Group is setup
- An Environment Manager version of 25.9.26 or greater
- A Footprint version of 26.03.13 or greater
 Set Footprint Mobile Web to use Microsoft Entra ID (Azure)
Additional Prerequisites
- Access to Environment Manager
If you are not hosting your own Microsoft Entra ID (Azure Active Directory) this section is only intended as reference. Datex will manage this setup for those having Datex host their Microsoft Entra ID tenant.
However, if you are hosting your own Microsoft Entra ID tenant, you may need to complete these steps yourself. Please be advised that you will need to stop the environment before you can start so there will be downtime.
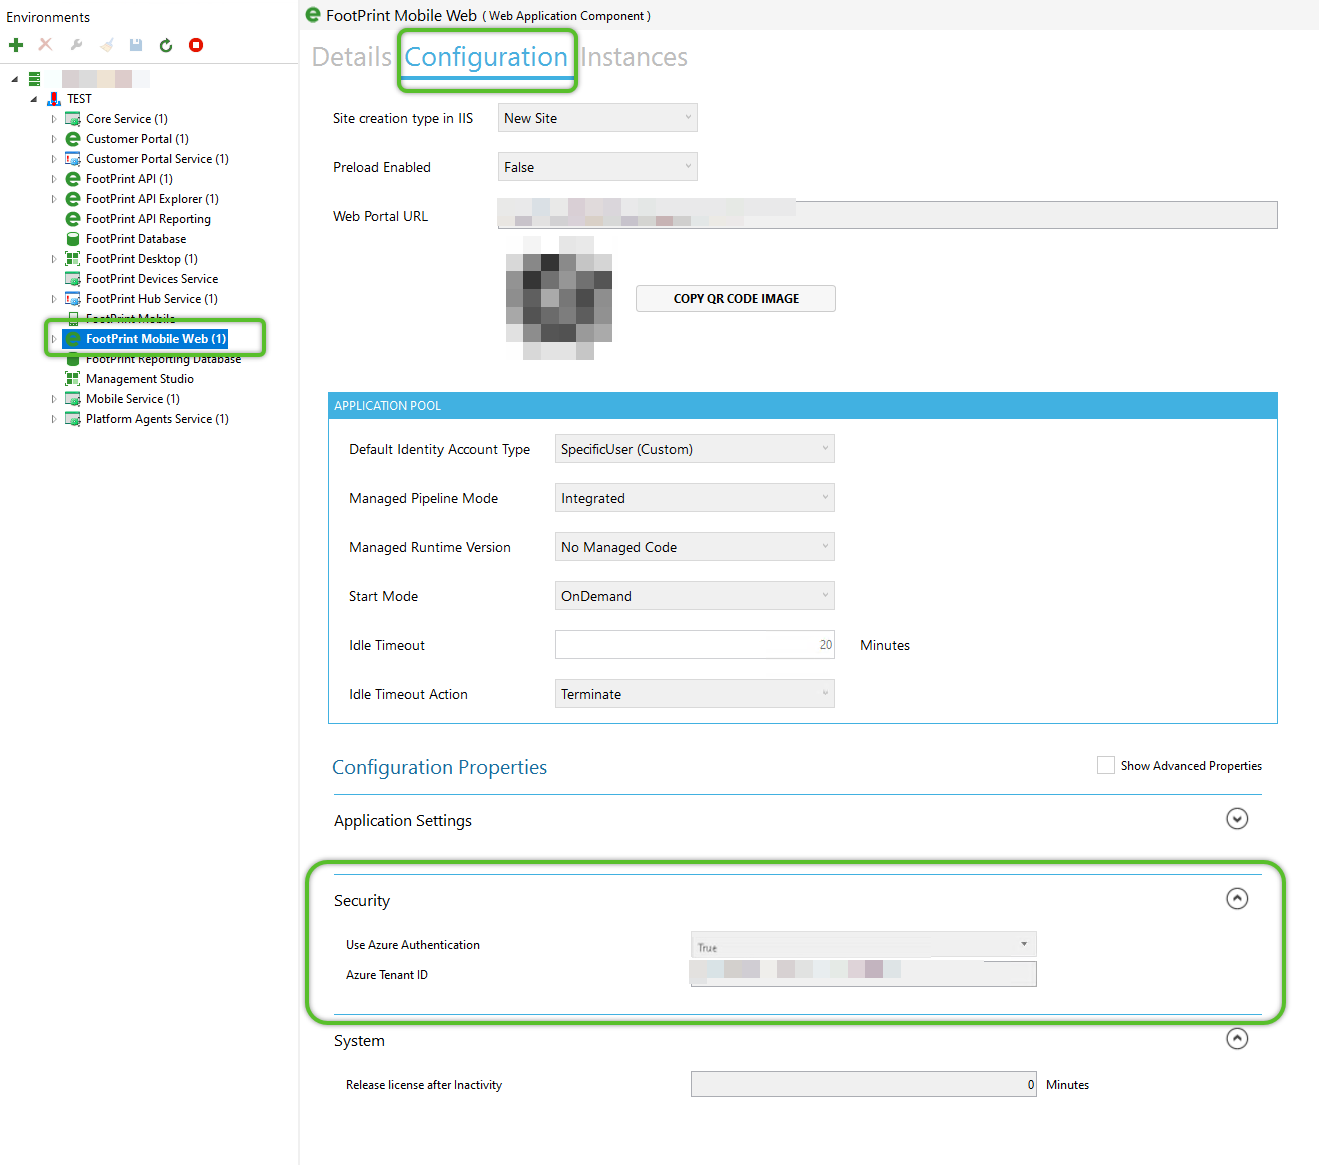
1. In Environment Manager, open Footprint Mobile Web from the left side navigation menu then click the Configuration tab.
2. Open the Security section, provide an Azure Tenant ID and set the Use Azure Authentication to "True".
Reminder: These setting can only be set when the environment has been stopped.
3. Restart the environment.
Adding a user for those hosting their own Microsoft Entra ID tenants
Before a user can be added to Datex Manager, the user must first be added to Microsoft Entra ID. These steps can be followed if an organization is already using and managing Microsoft Entra ID internally. This means that an organization is managing their Microsoft Entra ID by adding employees and inviting users themselves. If this is not the case, use the external invite approach for those having Datex host their Microsoft Entra ID.
Adding user to Datex Manager
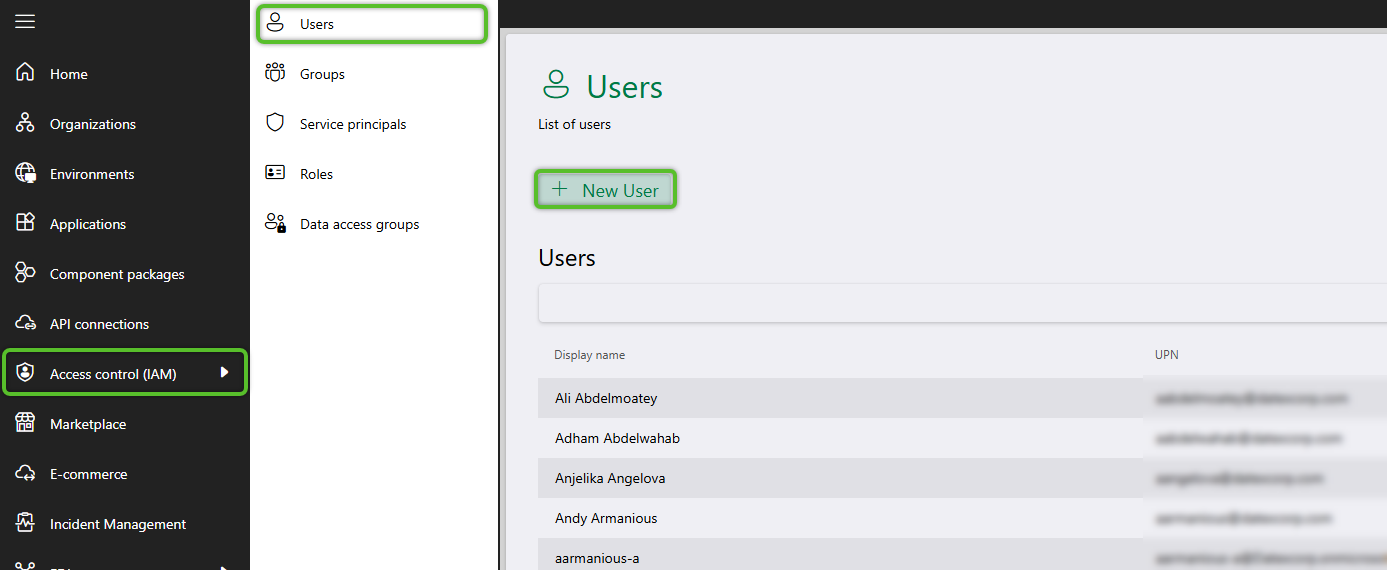
1. In Datex Manager, click Access control (IAM), then Users in the left navigation menu.
2. Click Manage users to open the drop down menu and select Manage Entra ID users.
This will open a window for managing users.
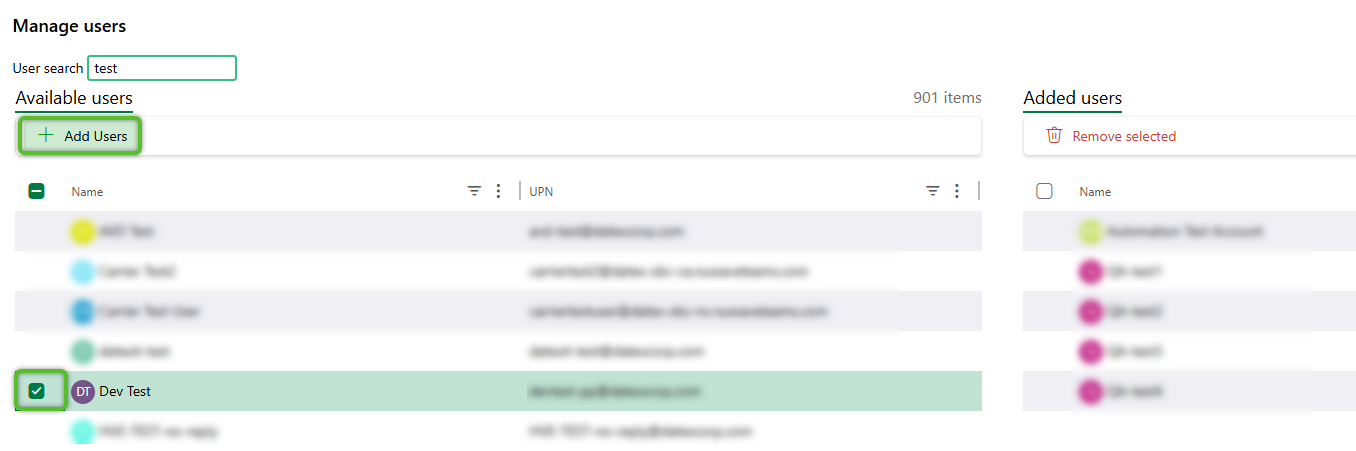
2. In the user management window, use the User search box above the Available users tab to find the new user you want to add.
Note
If the user can't be found in the list, they may either need to be added to an organization's own Microsoft Entra ID by their own internal IT support. If an organization is not managing their own Microsoft Entra ID, they will need to invite the user using the external user approach instead.
3. Once the user has been located, hover over the row then select the check box to the left of the Name, then click the + Add Users button.
The user will move from the Available users tab to the Added users tab.
4. Click the Save changes button at the bottom right of the window to confirm the addition then close the window.
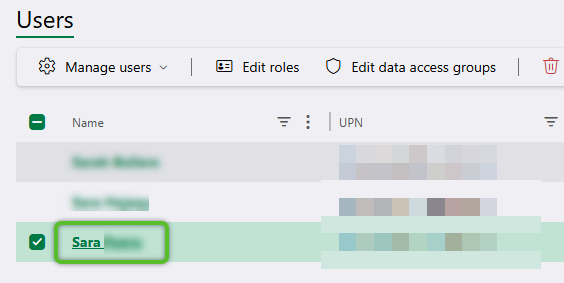
5. Back in the Users hub, locate the new user in the grid and click on their Name hyperlink. This will open a flyout to edit the user's information.
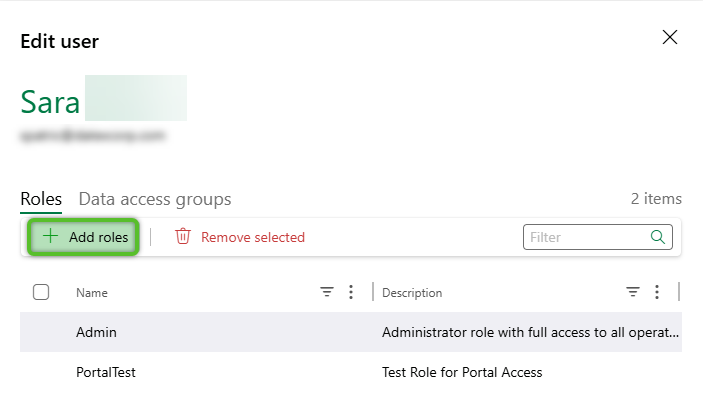
6. In the flyout, on the Roles tab, click the + Add roles button. This will open another flyout with a list of all available Roles.
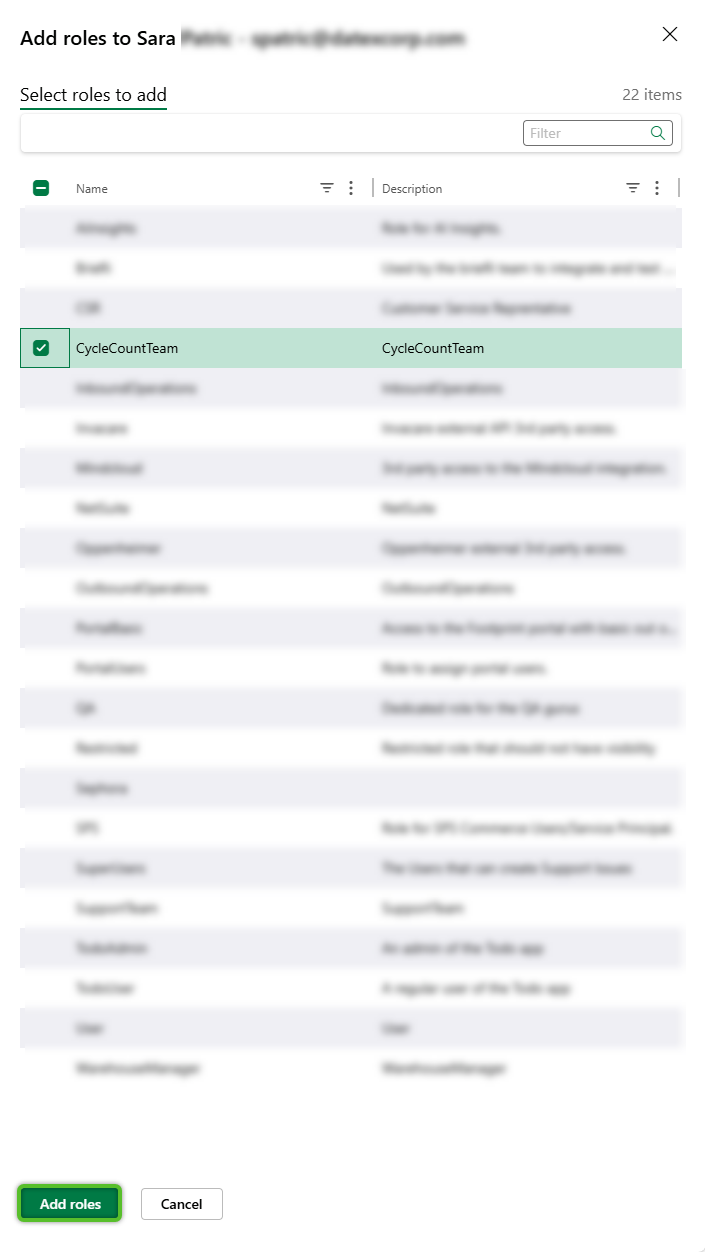
7. Check the Role or Roles to assign the user to, then click the Add roles button at the bottom to close the roles flyout and return to the user edit flyout.
Note
Please note at this time configuration for a Footprint Mobile Role is not managed in Datex Manager, but is instead managed in Management Studio.
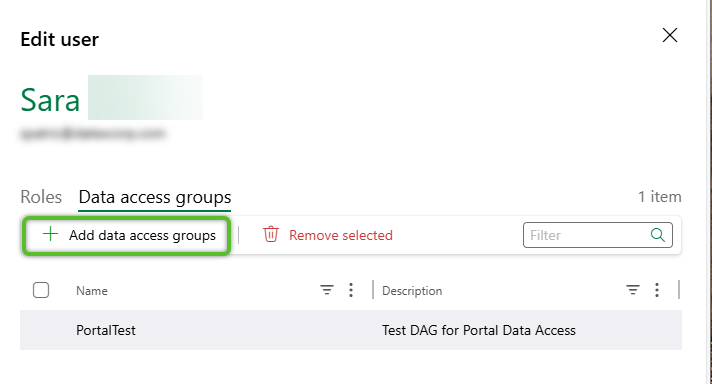
8. Click on the Data access groups tab, then click the + Data access groups button. This will open another flyout with a list of all available Data Access Groups.
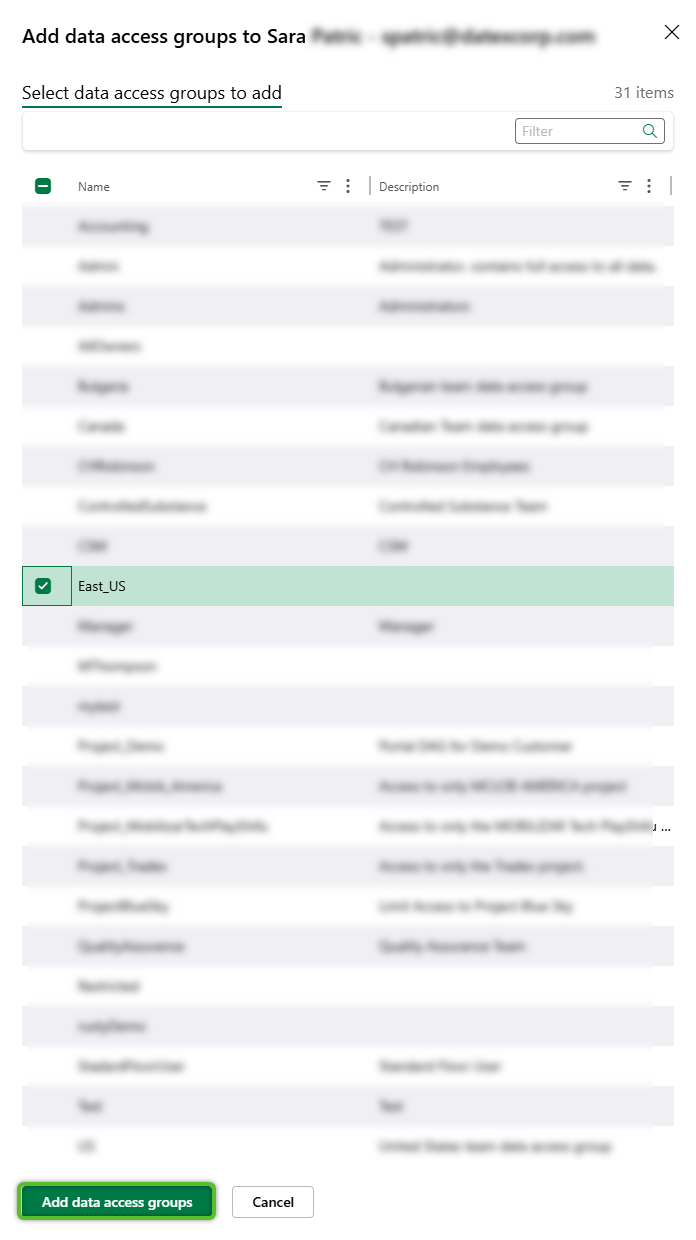
9. Check the Data Access Group or groups to assign the user to, then click the Add data access groups button at the bottom to close the Data Access Group flyout and return to the user edit flyout.
10. Click the Save button at the bottom of the flyout to apply the changes and return to the User hub.
Adding user to Environment Manager
1. Returning to Environment Manager, open the environment from the left side navigation menu and click the Authorizationtab.
2. Click the Add Azure AD Users/ Groups ... button to open the user and group selection window.
If all mobile users are being assigned to a user group in the Microsoft Entra ID this step will only have to be performed once for the group. Otherwise these steps will need to be completed for each user added.
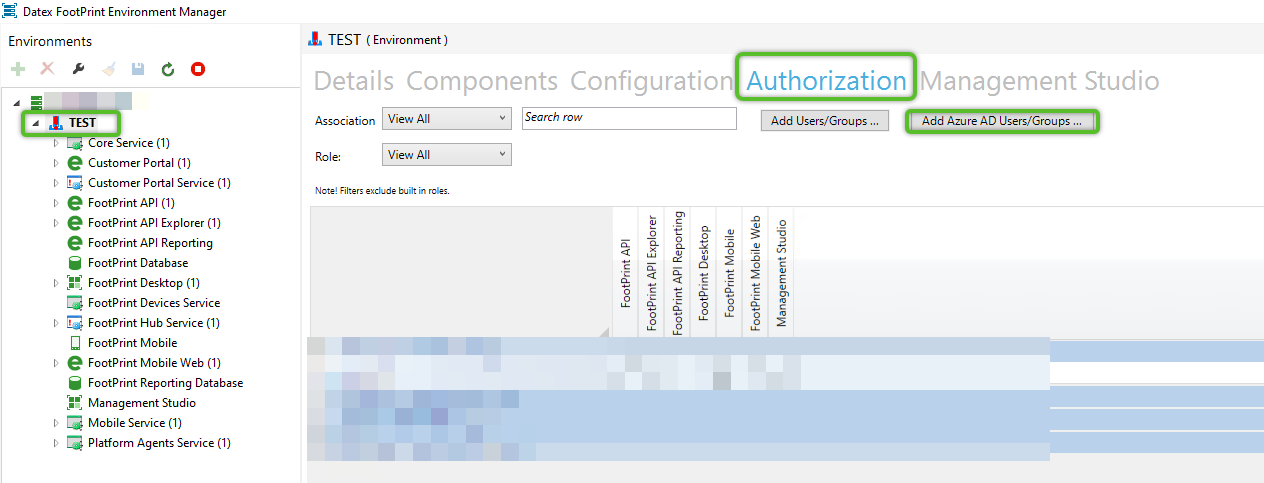
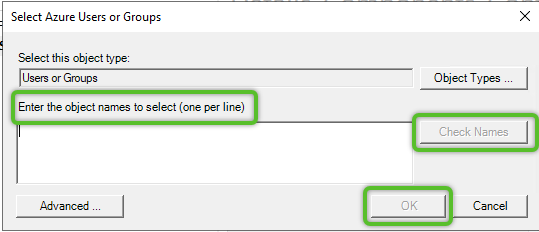
3. Start entering the group or user’s name (partial input is acceptable), then select the Check Names button. Once the user has been located and selected, click the OK button.
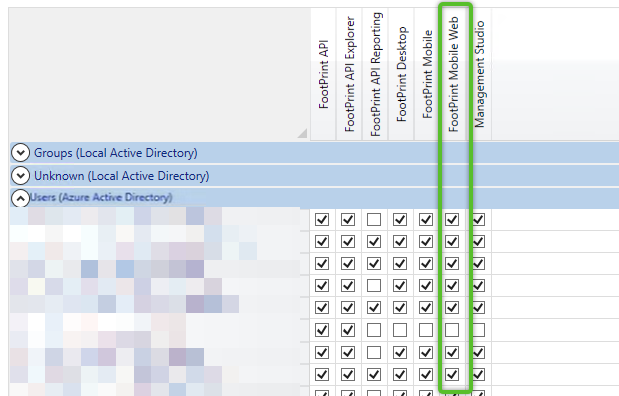
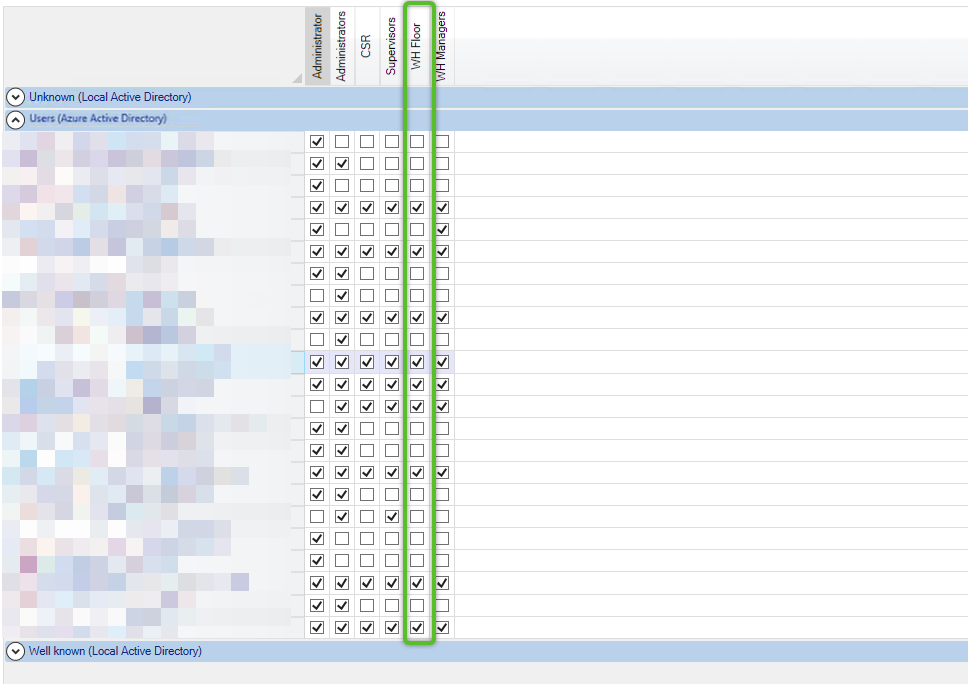
4. In the grid locate the added user or group and ensure the check box for the Footprint Mobile Web column is checked.
Click the Save Changes button at the bottom of the screen.
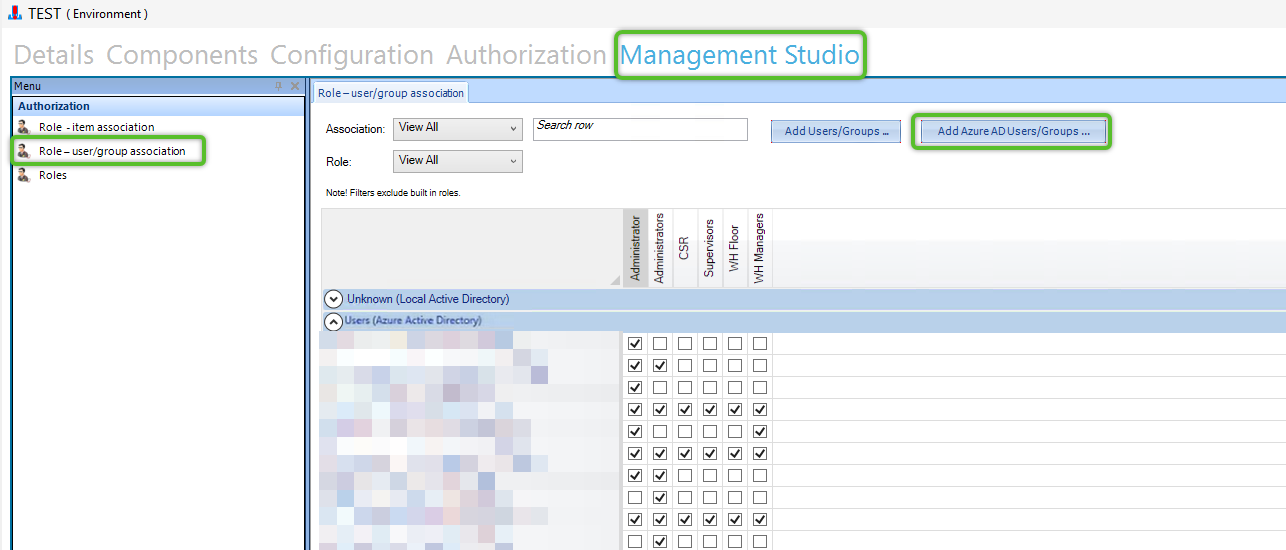
5. Click the Management Studio tab, then click the Role user /group association button on the left side menu within the Management Studio tab.
6. Click the Add Azure AD Users/ Groups ... button to open the user and group selection window.
If all mobile users are being assigned to a user group in the Microsoft Entra ID this step will only have to be performed once for the group. Otherwise these steps will need to be completed for each user added.
7. Start entering the group or user’s name (partial input is acceptable), then select the Check Names button. Once the user has been located and selected, click the OK button.
8. In the grid locate the added user or group and ensure the check box for the Role created for Footprint Mobile Web column is checked.
Click the Save Changes button at the bottom of the screen.
Adding a user when Datex hosts your Microsoft Entra ID (Azure)
Before a user can be added to Datex Manager, the user must first be added to Microsoft Entra ID. If an organization is not managing their own Microsoft Entra ID a new user will need to be invited into the tenant.
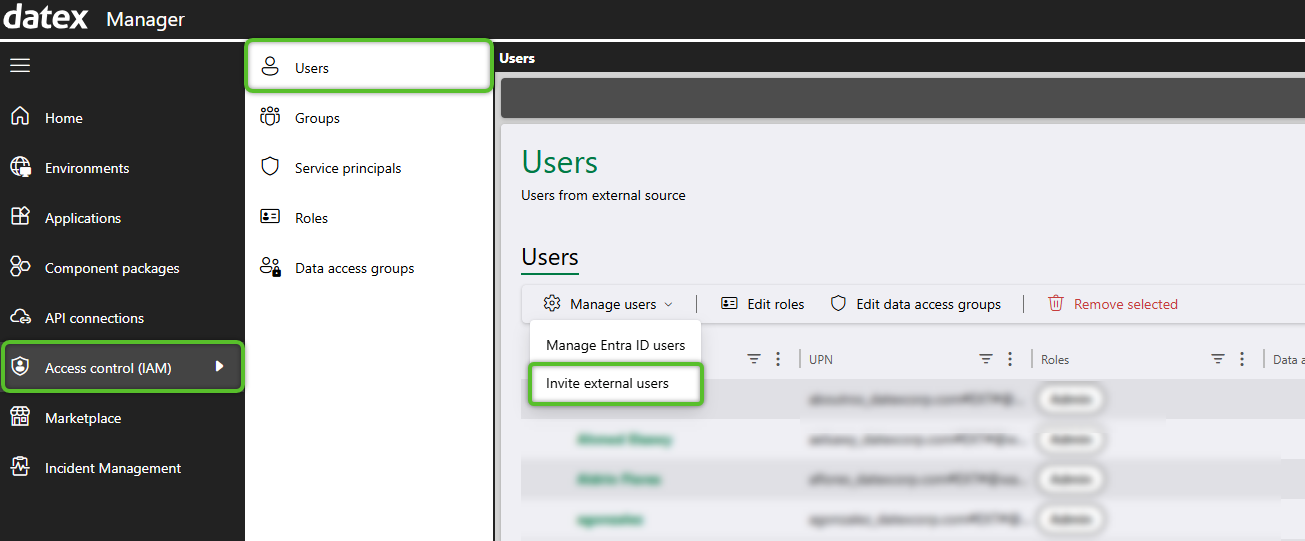
1. In Datex Manager, click Access control (IAM), then Users in the left navigation menu.
2. Click Manage users to open the drop down menu and select Invite external users.
This will open a window for inviting external users.
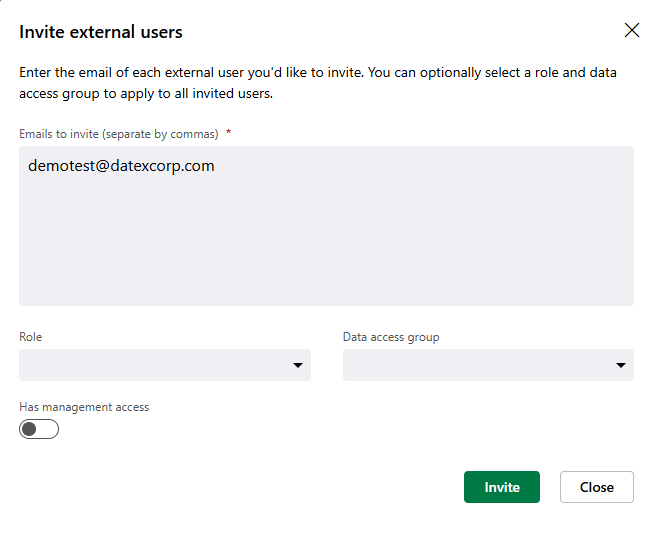
2. In the invite window, enter the external users email address in the Emails to invite text box.
The Role and Data access group drop downs can be used to assign the invited user to a Role and/or Data Access Group right away. This is optional for the invite, however the user will need to be assigned at least a Role to be able to use Footprint and Footprint Portal.
Additionally, Has management access can be toggled on to give the invited user access to Datex Manager. Unless part of the invited user's job requires access to Datex Manager where user access can be controlled, it is not recommended to give out access.
These selections can be updated later by following the same method outlined in steps 5 through 11 of the add an internal user setup.
3. Click the Invite button at the bottom right of the window to send the invite.
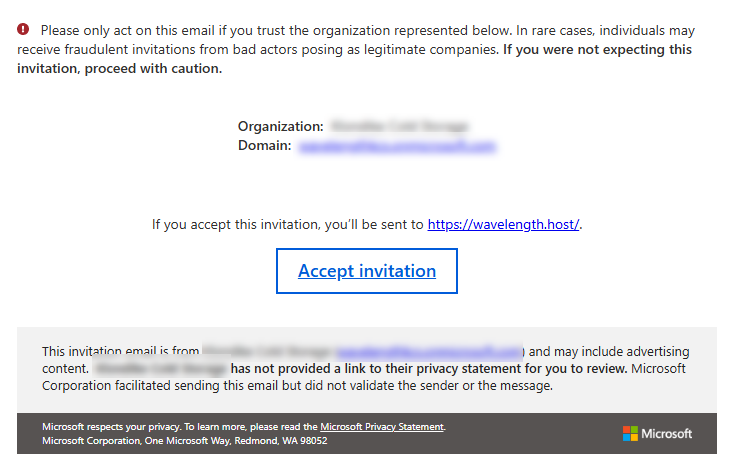
4. The recipient will receive an email similar to the included screenshot. They will need to follow the Accept invitation link and setup instructions that may include setting up two-factor authentication, depending on the organization.
5. Once the new user has accepted the invite, please reach out to Datex to manage the rest of the setup.
| Last Updated: |
| 04/20/2026 |

Copyright © 2026 Datex Corporation